Setting up a Windows Malware Analysis Lab Enviroment Using Flare
Setting up Flare VM for Malware Analysis
In this guide we are going to learn how to setup a safe and practical lab enviroment for malware analysis. We will be focusing on a windows lab enviroment using Flare VM. This is an open source project that contains scripts to setup a windows lab enviroment with tools for analyzing and reversing malware.
Here is a link to the project:
Choosing a Virtualization Platform:
The most common options for easy virtualization are vmware and virtualbox.
In this guide we will be using virtualbox. You can find information about how to download the software here:
Download a Windows 10 iso:
We will need a windows ISO with a version greater or equal to 10.
At the time of writing you can obtain a copy from here:
https://www.microsoft.com/en-us/software-download/windows10ISO/
Setup the Windows VM:
Before we can use Flare VM we will need to setup our windows 10 virtual machine.
I will not be going over how to setup a Windows VM as the steps varry between virtualization software. I will however put links below that show you how to setup a vm.
Preferably we want to use windows 10 pro as it makes the next steps a bit easier.
You can avoid needing a microsoft account by disconnecting the vm from the internet when running the install. Windows 10 pro also gives an “offline account” option.
Here are the links:
- VM Ware:
- Virtual Box:
Installing Flare:
Once we have our vm up we can begin the install process for Flare.
Step 1 Disabling Windows Updates on Windows 10 pro:
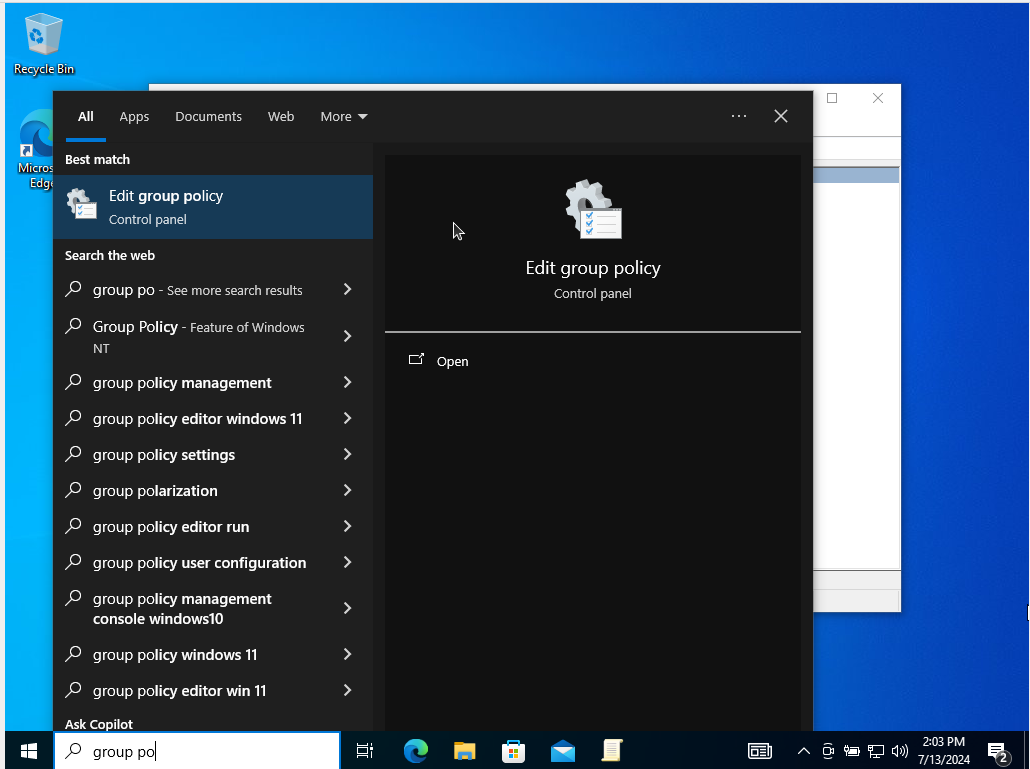
- Open the Group Policy Editor
- Search for “group policy” and click “Edit group policy”
- Follow the path: Computer Configuration > Administrative Templates > Windows Components > Windows Update
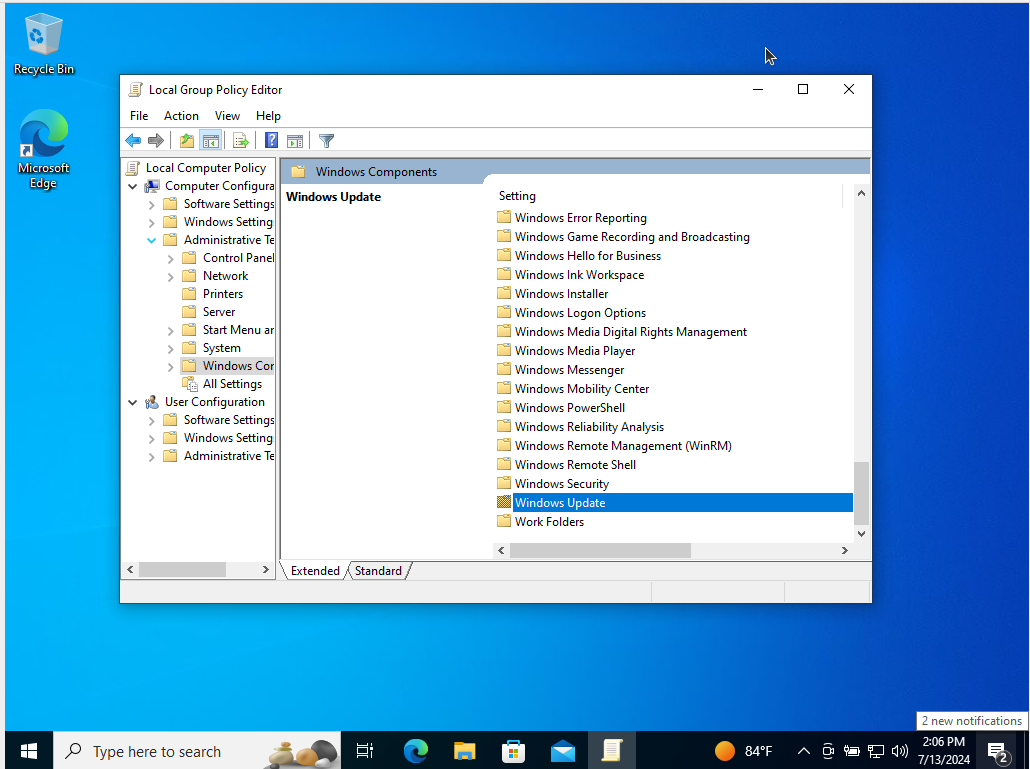
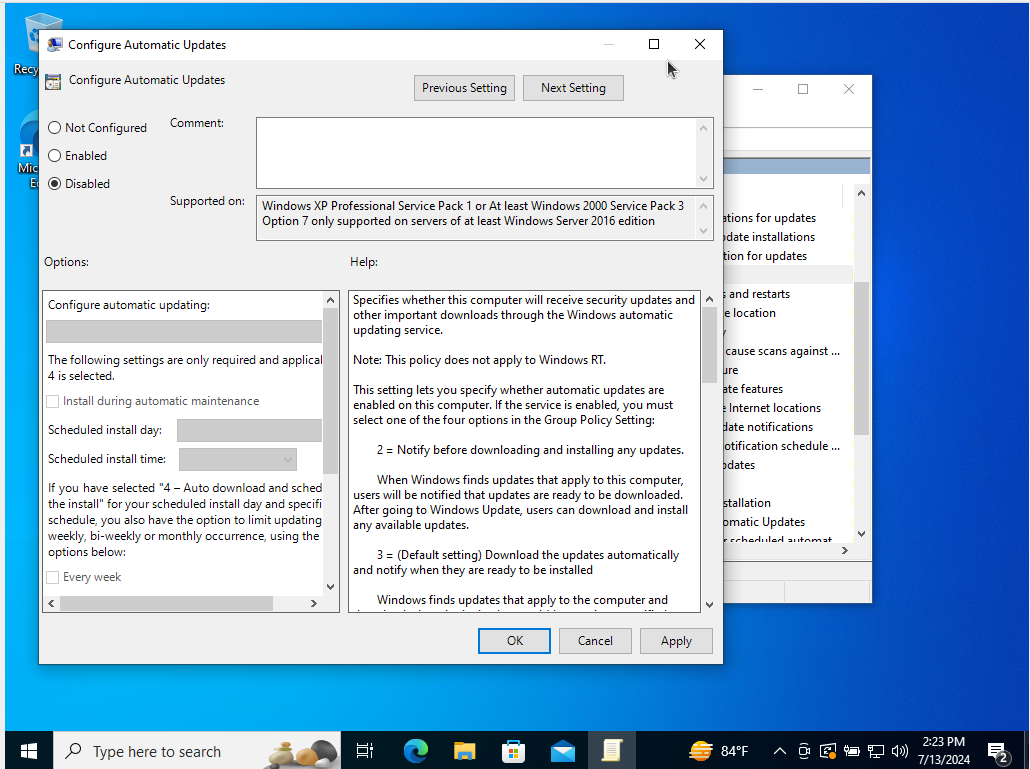
Double-click “Configure Automatic Updates.”
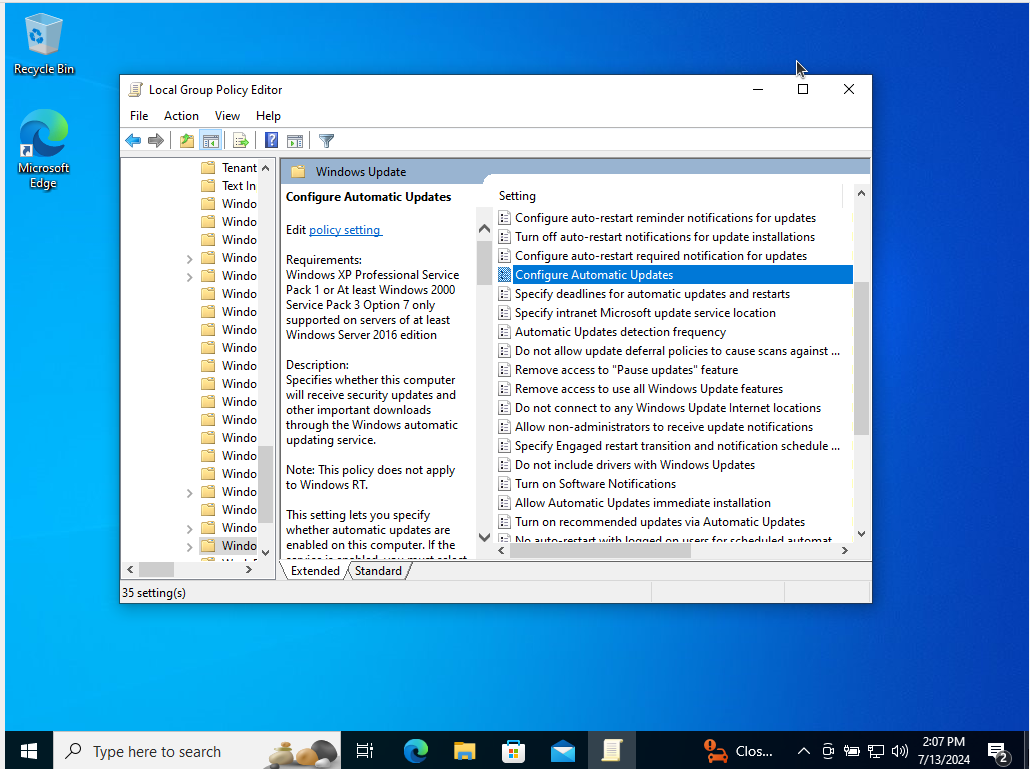
Then set to “Disabled”
If you do not have windows 10 pro on your VM additional methods can be used.
- You can find them here: https://www.windowscentral.com/how-stop-updates-installing-automatically-windows-10
Step 2 Disabling Tamper Protections and Anti Virus:
Flare prefers us to do this via group policy but it can also be done via windows defender.
- Here is a stackoverflow post detailing the process: https://superuser.com/questions/1757339/how-to-permanently-disable-windows-defender-real-time-protection-with-gpo/1757341#1757341
We are going to disable real-time protection via group policy like the last step.
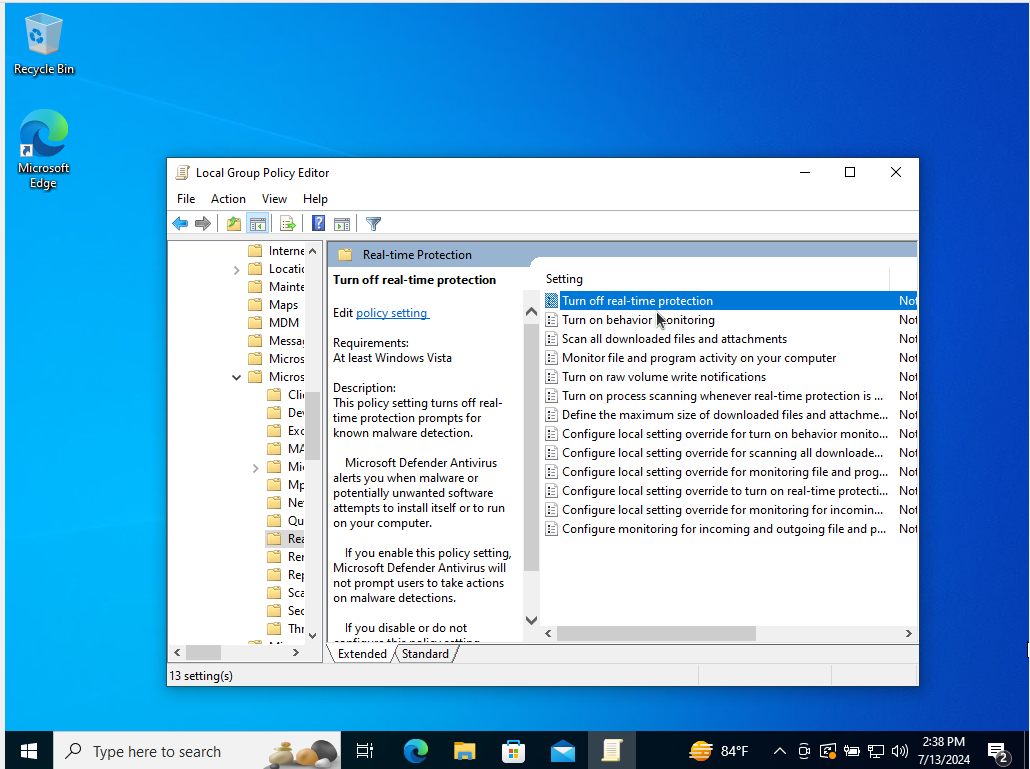
- Open the Group Policy Editor again
- Follow this path: Computer Configuration > Administrative Templates > Windows Components > Microsoft Defender Antivirus > Real-time Protection
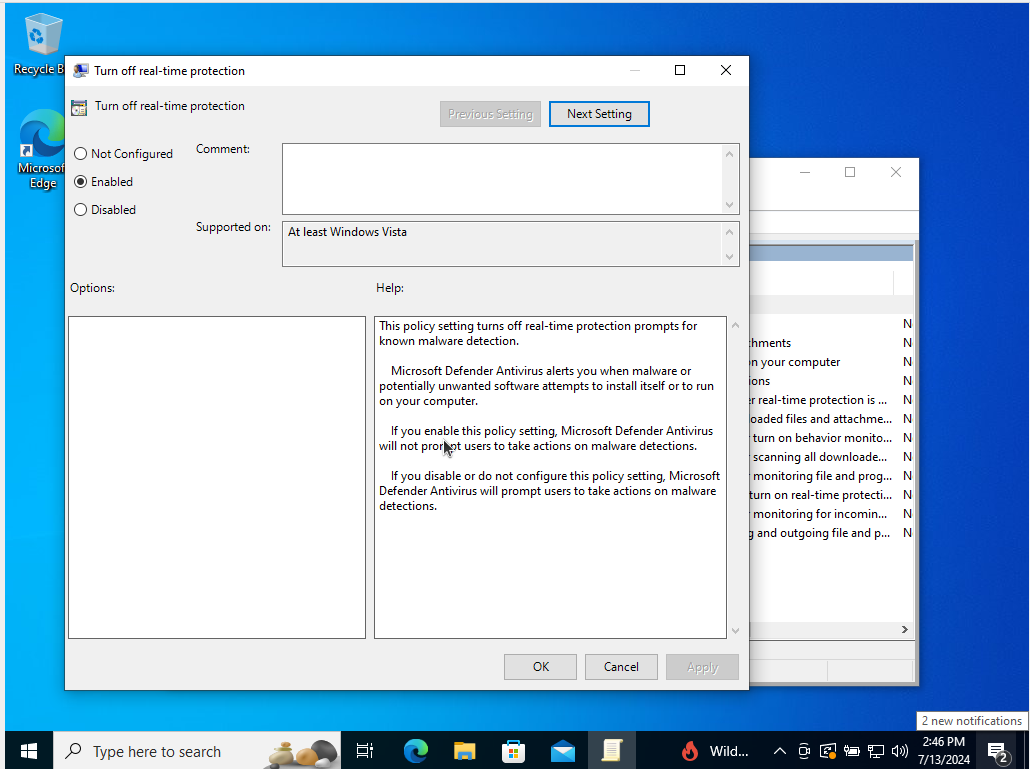
- Double-click “Turn off real-time protection”
Set to “Enabled”
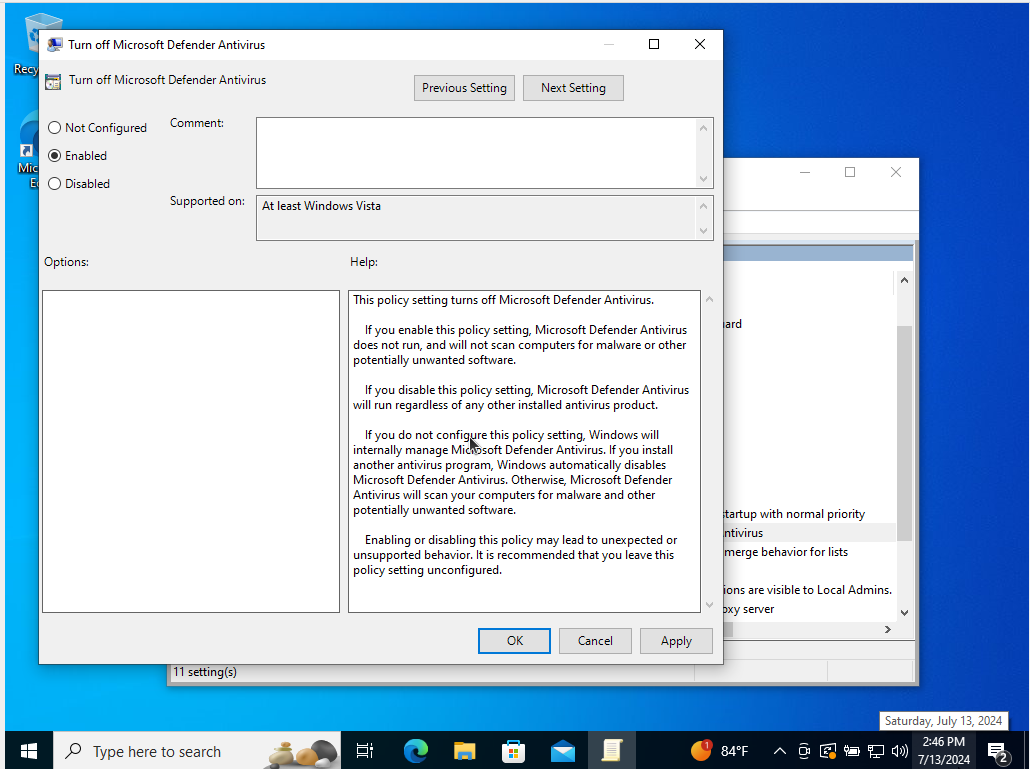
To disable microsoft defenderfollow the same process as above with a different path.
- Open the Group Policy Editor
- Follow the path: Computer Configuration > Administrative Templates > Windows Components > Microsoft Defender Antivirus
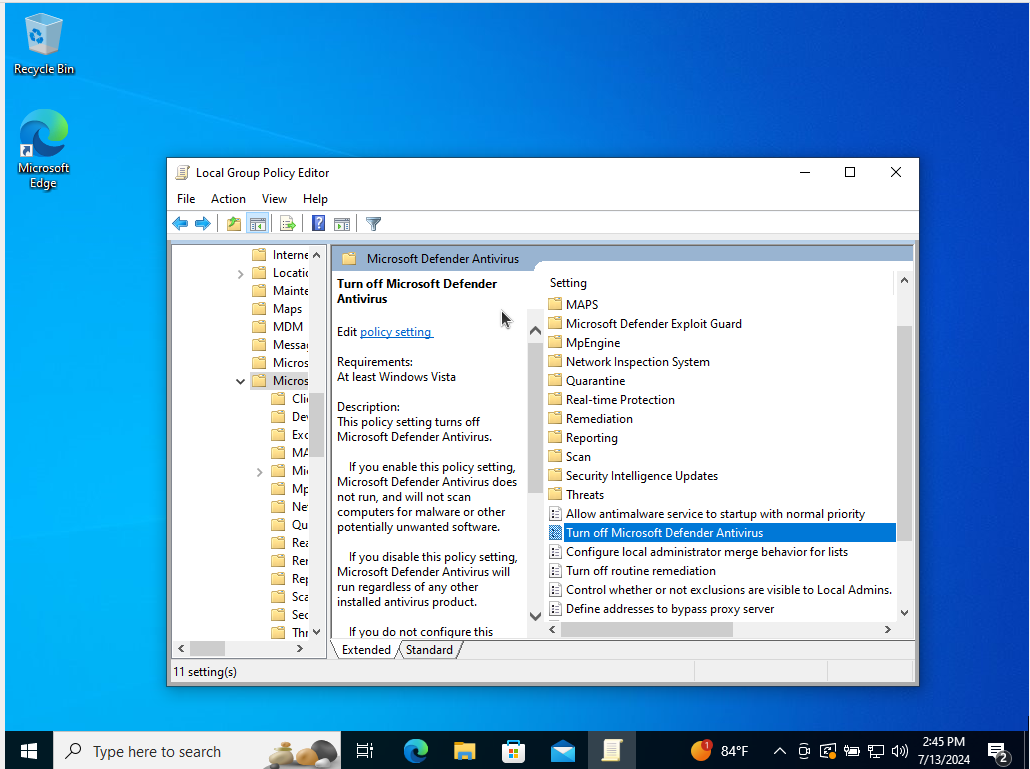
Enable “Turn off Microsoft Defender Antivirus”
Now restart the machine.
Finishing the Install:
Next we are going to run the install scripts for the Flare VM setup. These can be found at their github page: https://github.com/mandiant/flare-vm
We are going to follow the instructions as they are listed on gituhub:
They are as follows:
- Open a
PowerShellprompt as administrator - Download the installation script
installer.ps1to your Desktop:(New-Object net.webclient).DownloadFile('https://raw.githubusercontent.com/mandiant/flare-vm/main/install.ps1',"$([Environment]::GetFolderPath("Desktop"))\install.ps1")
- Unblock the installation script:
Unblock-File .\install.ps1
- Enable script execution:
Set-ExecutionPolicy Unrestricted -Force- If you receive an error saying the execution policy is overridden by a policy defined at a more specific scope, you may need to pass a scope in via
Set-ExecutionPolicy Unrestricted -Scope CurrentUser -Force. To view execution policies for all scopes, executeGet-ExecutionPolicy -List
- If you receive an error saying the execution policy is overridden by a policy defined at a more specific scope, you may need to pass a scope in via
- Finally, execute the installer script as follow:
.\install.ps1- To pass your password as an argument:
.\install.ps1 -password <password> - To use the CLI-only mode with minimal user interaction:
.\install.ps1 -password <password> -noWait -noGui - To use the CLI-only mode with minimal user interaction and a custom config file:
.\install.ps1 -customConfig <config.xml> -password <password> -noWait -noGui
- To pass your password as an argument:
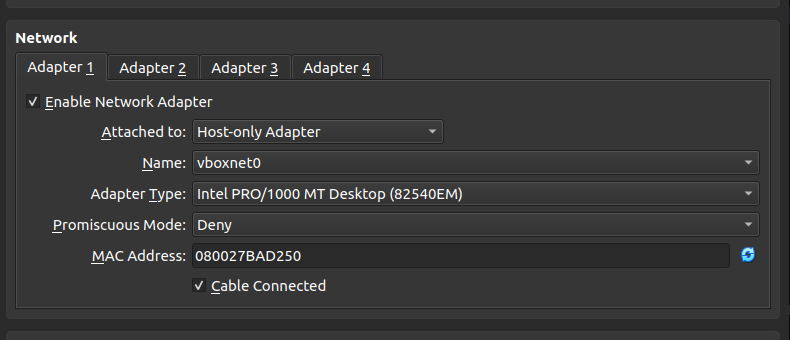
- After installation it is recommended to switch to
host-onlynetworking mode and take a VM snapshot
Running this script will take a long time. I recommended to walk away during the install as it can take over 3 hours.
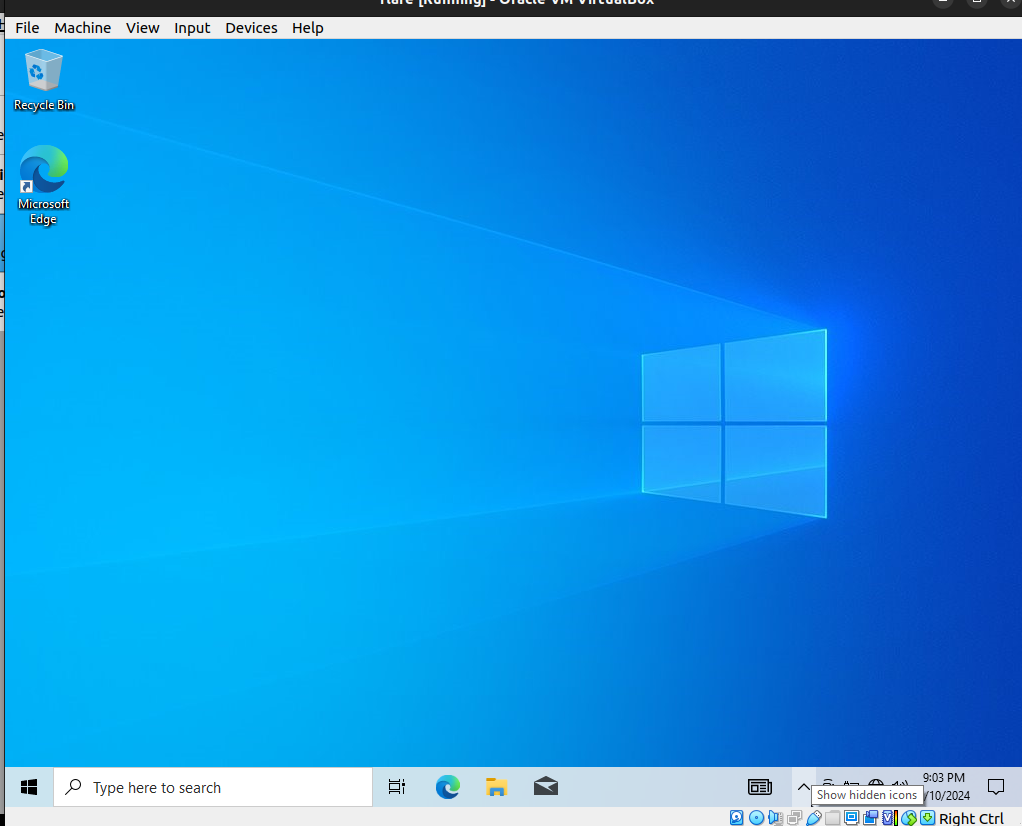
When you return you should be greated by the flare VM background and all the tools installed. This would be a good time to take another VM snapshot.
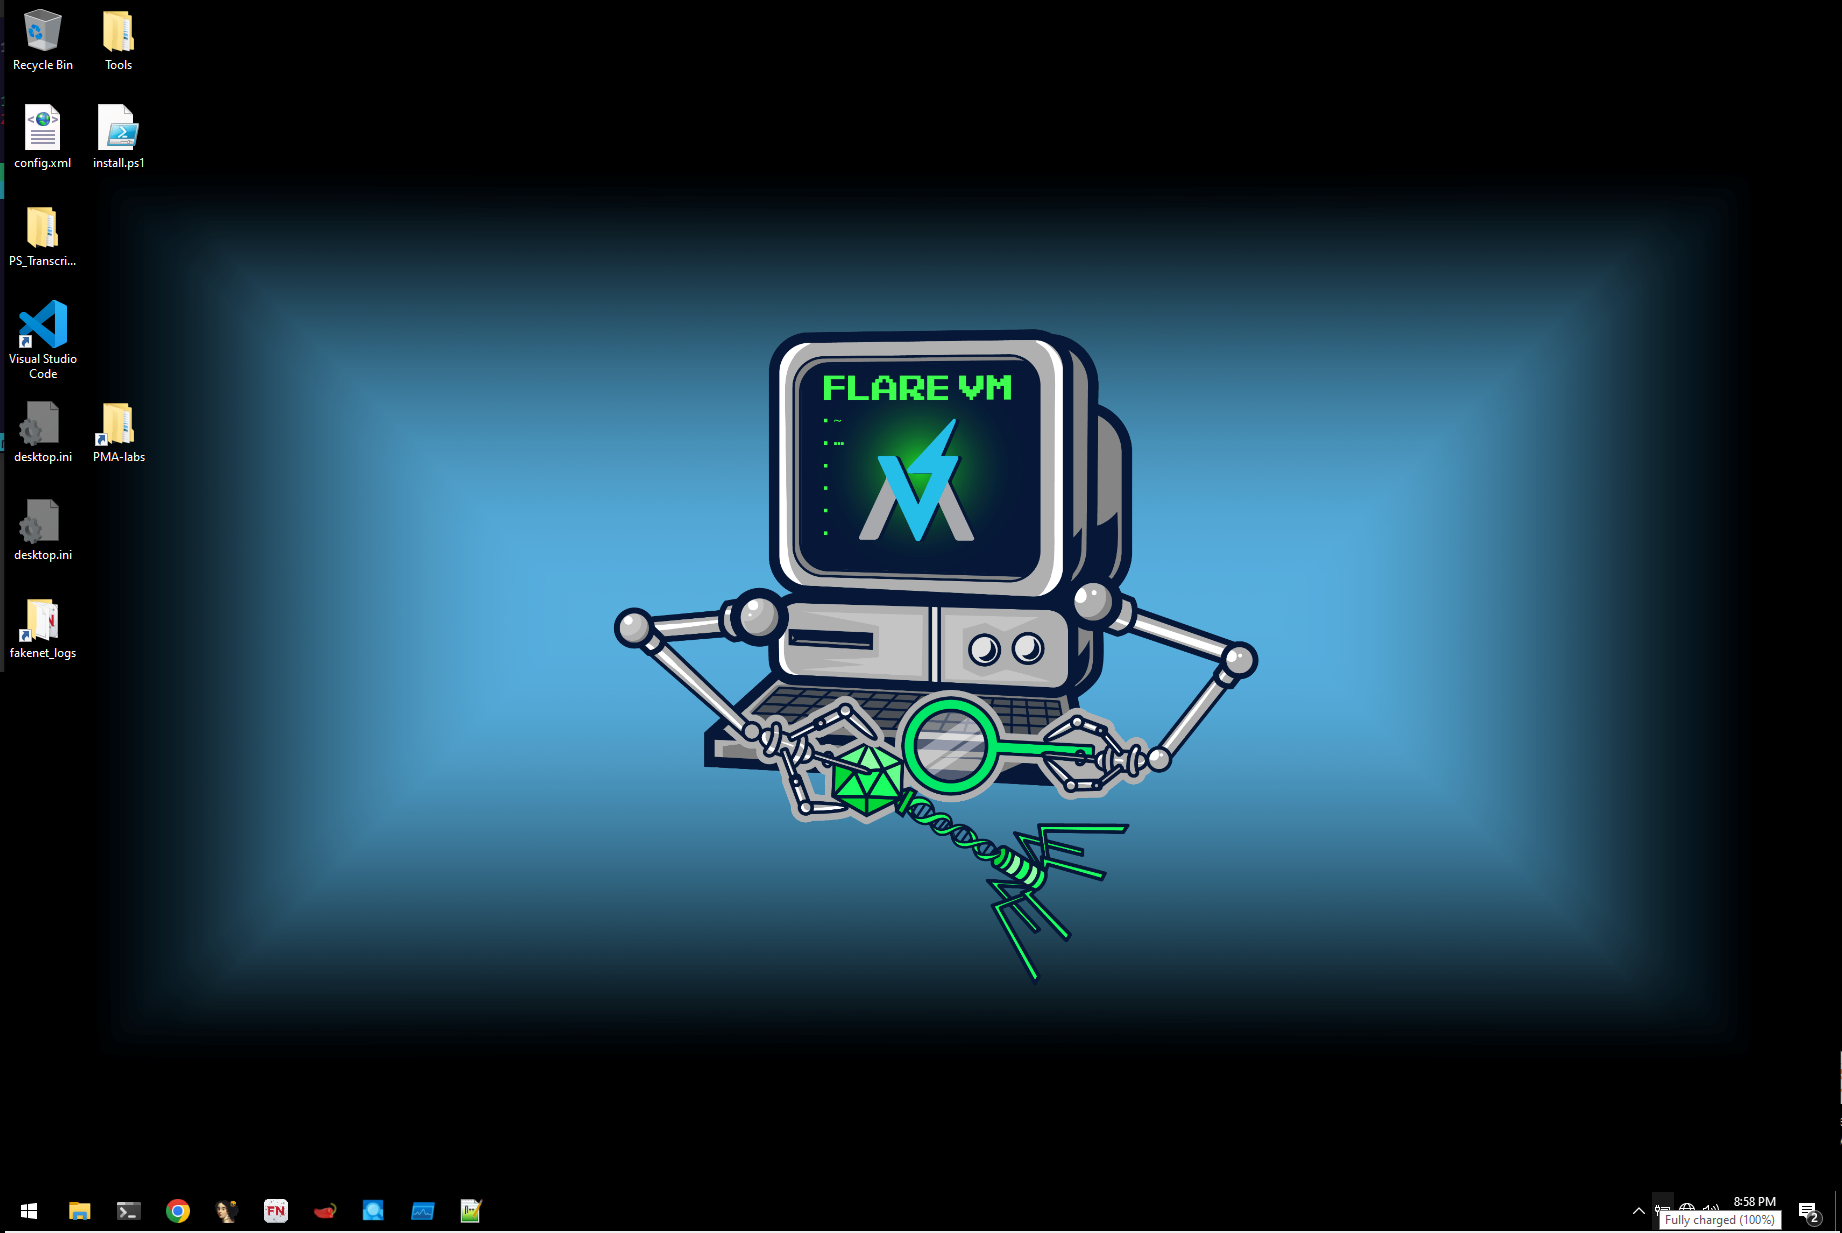
Your desktop might look slightly different as I moved some stuff around.
Post Install Networking:
Typically you want your VM to have no internet access as it opens an additonal attack vector for malware.
If you wish to use tools like fakenet you will need to setup the following.
Using VirtualBox you will have to set your network adapter to host only.
Before setting that you have to go into Tools > Network Manager > Create this will create a network for VirtualBox that will allow you to used the host only adapter.